1. Introduction:
A little while ago my smoke detector started to randomly wake me up with unexplainable alerts so I decided that it’s time for a new one. The hunt for a model that would be available in the UK for under £50, without the need for a third party cloud and the ability to easily run off a power supply rather than batteries was somewhat harder than expected but I finally got lucky on the Supported by Tasmota list. Nedis make the reasonably looking WIFIDS10WT which is available in a number of places, goes for around £30 and runs Tasmota with seemingly little effort. So I ordered one and crossed all fingers and toes…
2. First impression:
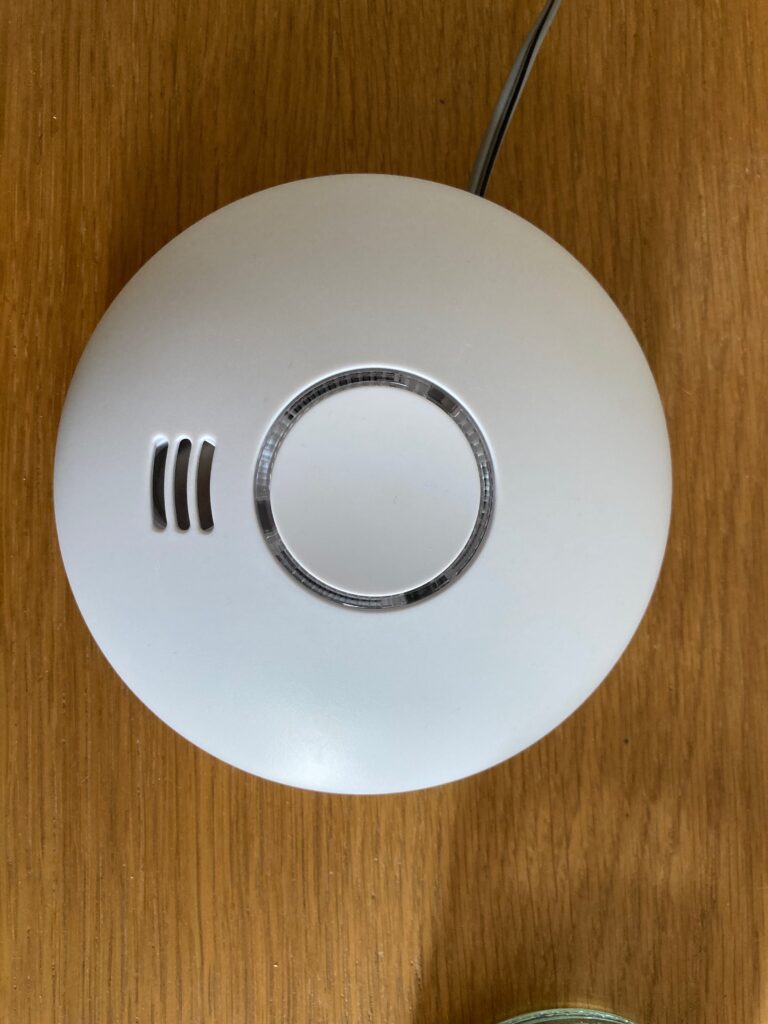
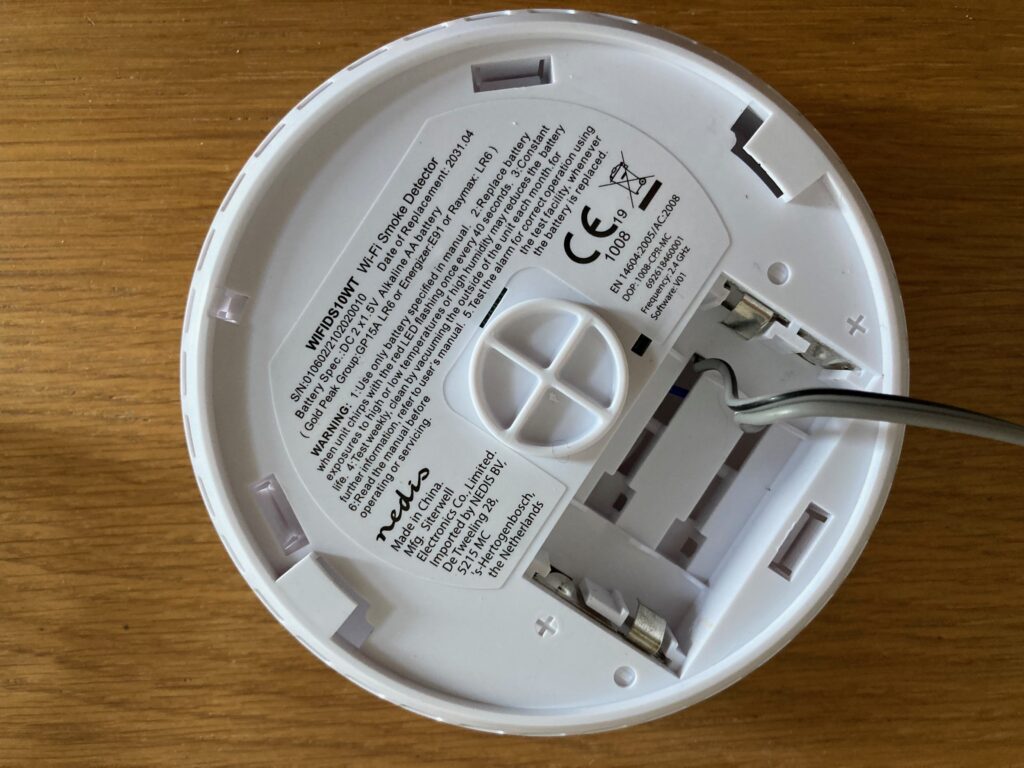
The unit has a nice slimline modern look, decent white plastic and a solid backplate. There is a short flash of the red LED every now and then, I don’t mind but with the monitoring below it would seem ok to take out the LED if it bothers you. These are obviously made to run from two AA batteries which leaves a nice cavity to play with given that I’m planning to run these off a permanent power source.
3. A look inside and how it all works:
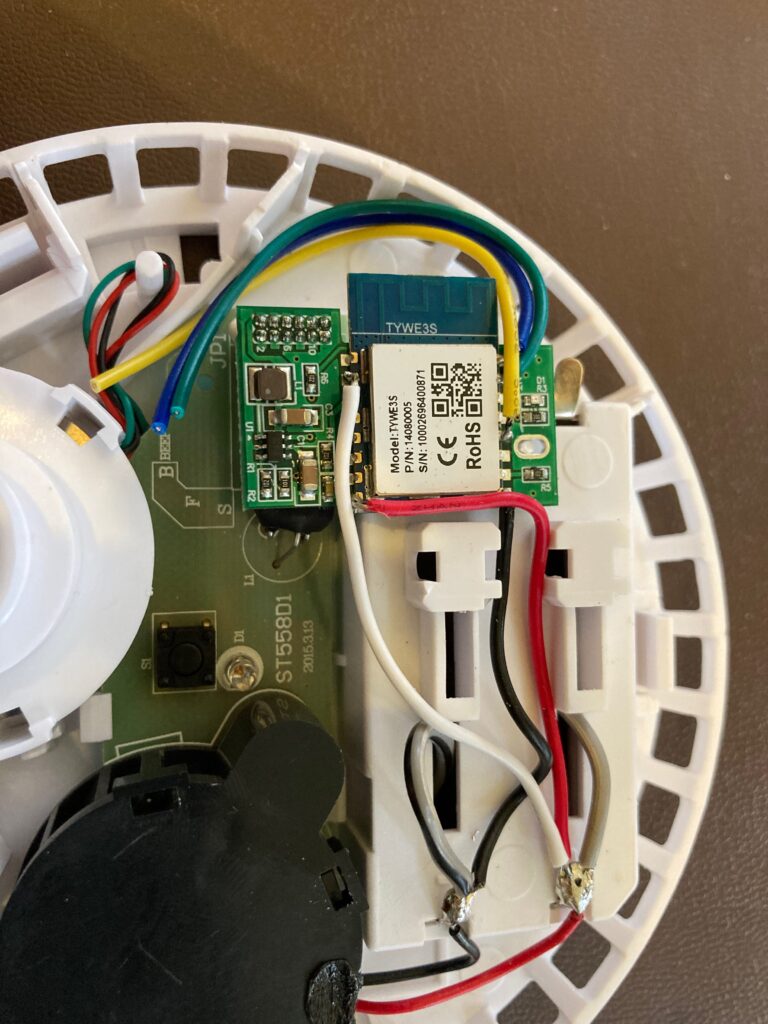
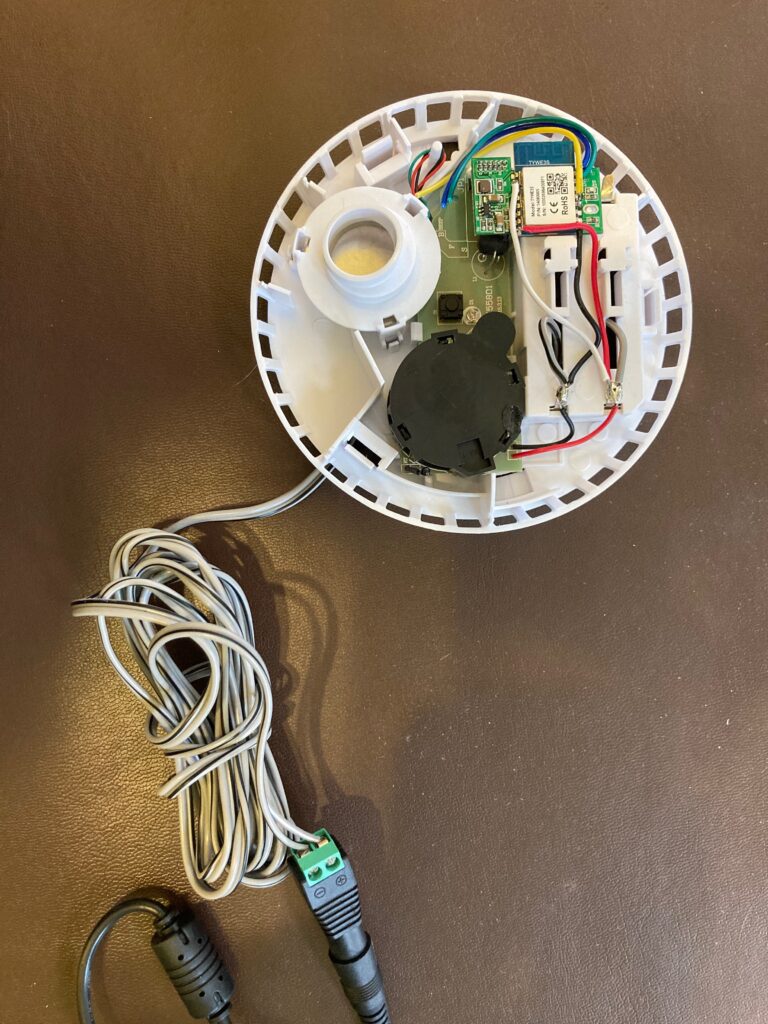
The unit opens with little effort, there are three plastic noses to unclip from the backside and the lid comes off. The inside is hiding the inevitable TYWE3S module. Running the TYWE3S all the time would empty the battery rather quickly so the way this seems to work is that there is a separate low power control chip, likely similar to what is in all the other £5 9V smoke detectors which monitors the smoke sensor and springs to life with vigorous beeping once it detects me burning some food in the kitchen. What this unit also seems to do at this stage is fire up it’s TYWE3S which then connects to wifi to do its smart business.
4. ESPHome vs Tasmota
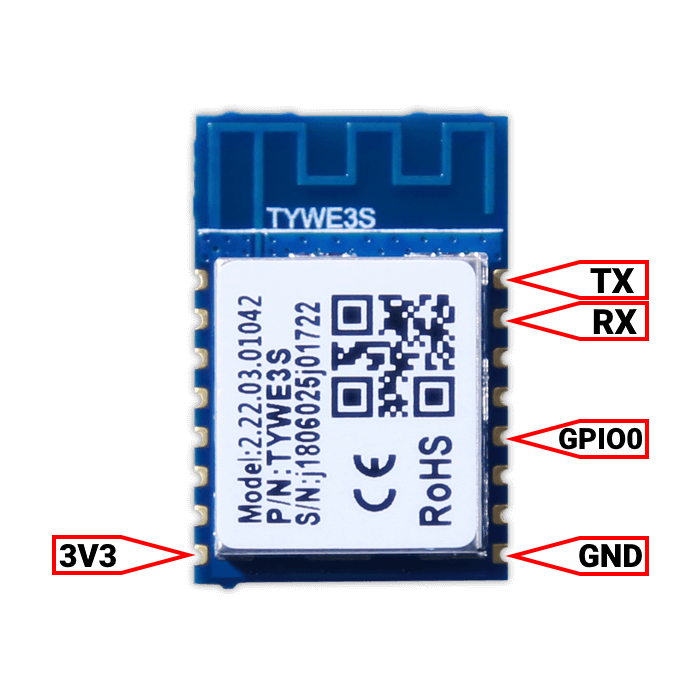
The TYWE3S simply pulls off the header and after 10min with a soldering iron I was ready to flash the unit to something more useful, as usual the trick to get these into programming mode is to set GPIO0 to GND. Flashing ESPHome is relatively straight forward with the ESPHome Flasher and there is support for TUYA MCU on ESPHome these days yet I ran into the same issue as others in as much that this does not seem to be a clean TUYA implementation so the TUYA component doesn’t spit out any useful Datapoints. The obvious alternative is Tasmota which installs very easily with their web installer and with a couple of additional configuration steps make it pick up all the right commands and forwards them to Home Assistant via MQTT. I followed this guide to get Tasmota up and running with the following commands:
{"NAME":"Nedis WIFIDS10WT","GPIO":[0,107,0,108,0,0,0,0,0,0,0,0,0],"FLAG":0,"BASE":54}
TuyaMCU 51,51
Backlog SetOption1 1; SetOption65 1
Rule1
ON TuyaReceived#CmndData=6A04000100 DO publish2 stat/%topic%/FIRE OFF ENDON
ON TuyaReceived#CmndData=6A04000100 DO publish2 stat/%topic%/TEST OFF ENDON
ON TuyaReceived#CmndData=6A04000100 DO publish2 stat/%topic%/BATTERY OFF ENDON
ON TuyaReceived#CmndData=6A04000100 DO publish2 stat/%topic%/MUTE OFF ENDON
ON TuyaReceived#CmndData=6A04000101 DO publish2 stat/%topic%/FIRE ON ENDON
ON TuyaReceived#CmndData=6A04000101 DO publish2 stat/%topic%/MUTE OFF ENDON
ON TuyaReceived#CmndData=6A04000102 DO publish2 stat/%topic%/FIRE ON ENDON
ON TuyaReceived#CmndData=6A04000102 DO publish2 stat/%topic%/MUTE ON ENDON
ON TuyaReceived#CmndData=6A04000103 DO publish2 stat/%topic%/FIRE ON ENDON
ON TuyaReceived#CmndData=6A04000103 DO publish2 stat/%topic%/TEST ON ENDON
ON TuyaReceived#CmndData=6A04000103 DO publish2 stat/%topic%/MUTE OFF ENDON
ON TuyaReceived#CmndData=6A04000104 DO publish2 stat/%topic%/BATTERY ON ENDON
Rule1 1
Rule2
ON system#boot do publish2 homeassistant/binary_sensor/%macaddr%_fire/config {"name":"Fire Alarm","state_topic":"stat/%topic%/FIRE","device_class":"smoke","unique_id":"%macaddr%_fire","device":{"connections":[["mac","%macaddr%"]]}} ENDON
ON system#boot do publish2 homeassistant/binary_sensor/%macaddr%_test/config {"name":"Fire Alarm Test","state_topic":"stat/%topic%/TEST","icon":"mdi:bell-alert","unique_id":"%macaddr%_test","device":{"connections":[["mac","%macaddr%"]]}} ENDON
ON system#boot do publish2 homeassistant/binary_sensor/%macaddr%_mute/config {"name":"Fire Alarm Mute","state_topic":"stat/%topic%/MUTE","icon":"mdi:bell-sleep","unique_id":"%macaddr%_mute","device":{"connections":[["mac","%macaddr%"]]}} ENDON
ON system#boot do publish2 homeassistant/binary_sensor/%macaddr%_battery/config {"name":"Fire Alarm Battery","state_topic":"stat/%topic%/BATTERY","device_class":"battery","unique_id":"%macaddr%_battery","device":{"connections":[["mac","%macaddr%"]]}} ENDON
Rule2 1
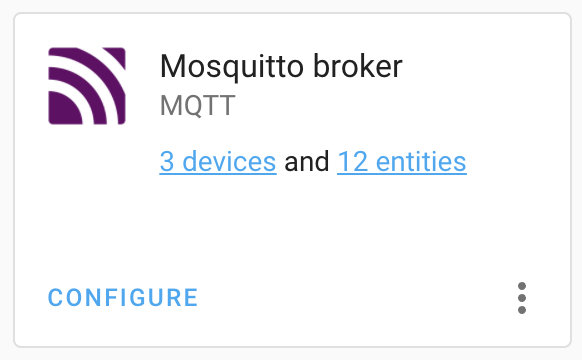
SetOption66 1Add in a more descriptive name for the device under WIFI configuration and set up the MQTT link to my Home Assistant server and all was well. Pressing the big test button on the smoke detector makes ones ears tingle but also triggers a couple of MQTT messages and the Mosquito broker in Home Assistant automatically detects the device.

5. Power supply and how to keep an eye on things:
So far I had only been running off the two supplied AA batteries which seemed to work fine but I somewhat dislike the idea as they always seem to run out when I’m asleep. I’d also prefer to know if the smoke detectors are alive rather than blindly trusting them or having to test them all the time. A cable running from the positive power supply terminal to the 3V pin on the TYWE3S solves the problem and keeps Tasmota accessible. I didn’t get through the first night on the batteries in the pack when I tried this with the TYWE3S on permanently but on the plus side 3V power supplies are easy to come by. I went for adjustable ones from Amazon, just in case I want to repurpose them at a later stage, and they have a nice screw terminal. I’ve mounted the smoke detectors on the ceiling so can easily run the power cables from the loft above with two wires soldered onto the units battery terminals.
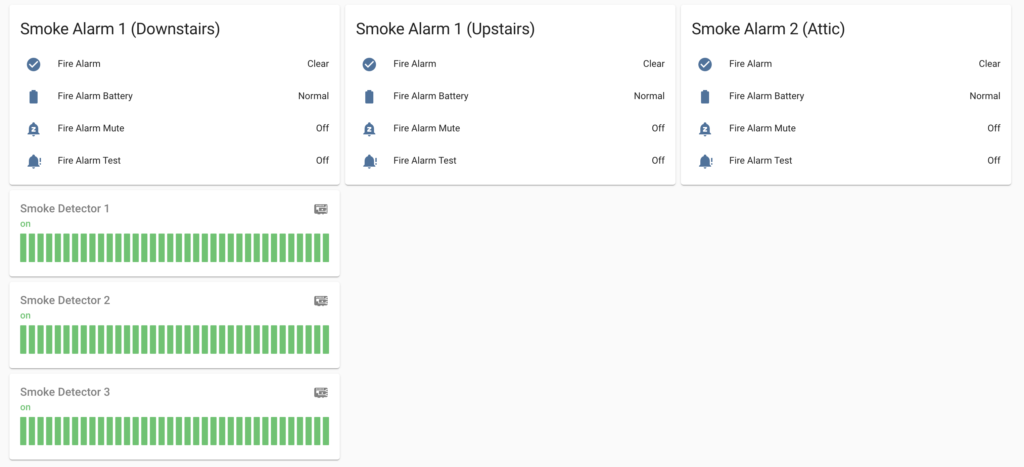
I’ve set myself up with a Lovelace Dashboard to monitor the smoke detectors, add a sensor to ping them and I also got a nice little uptime graph.
6. Supply voltage monitoring, just in case…
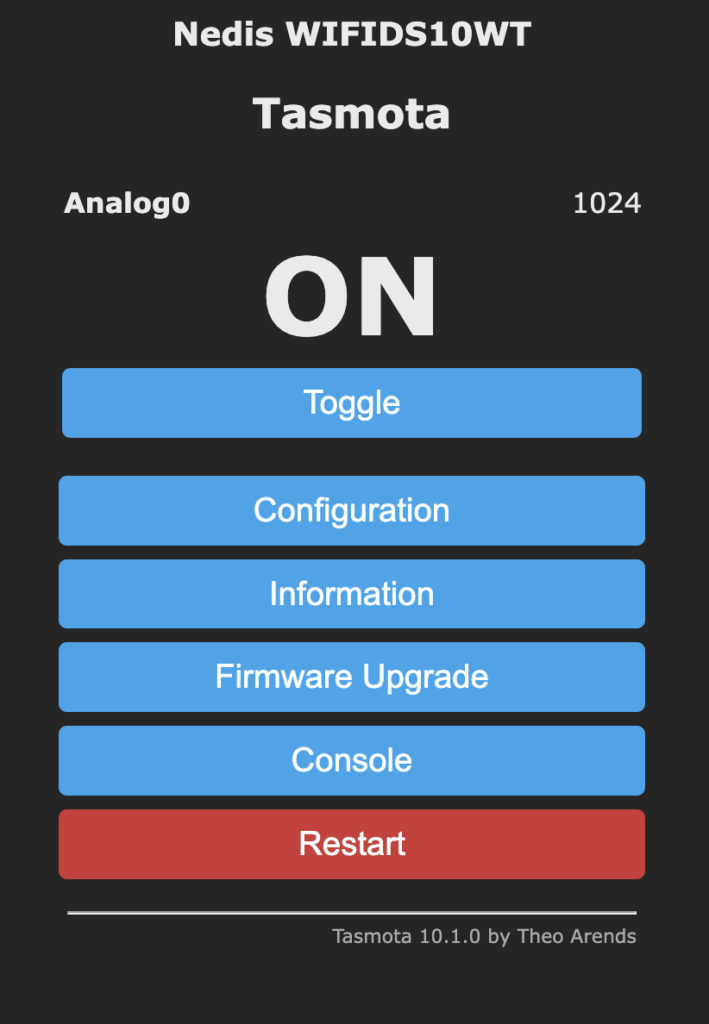
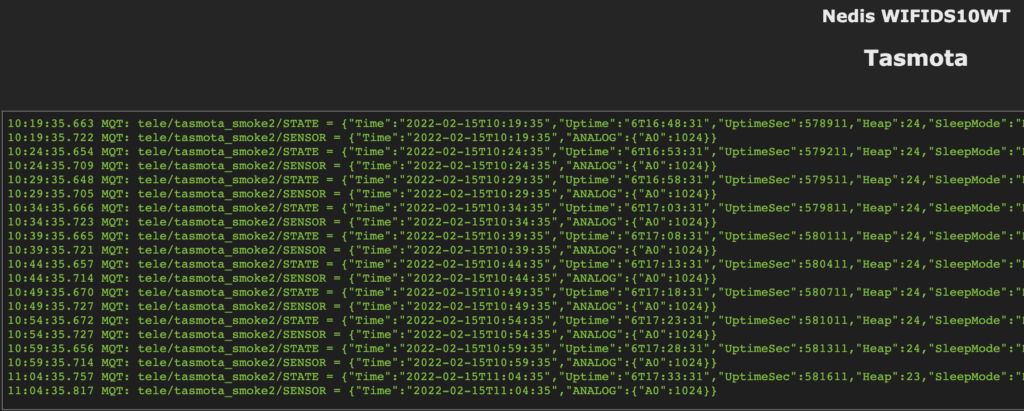
While the soldering iron was still hot I put one more connection between the ADC pin on the TYWE3S and the positive battery terminal which allows to monitor the incoming voltage. In Tasmota you’ll find that pin labelled as GPIO17, it’s hard to miss given that it’s the only one that offers ADC as a choice. I don’t really need it while I’m running the smoke detectors off a power supply but then it allows me to monitor the incoming voltage to identify potential issues with the power supply and run off batteries with battery monitoring in case I ever need to. It’s just one more wire and one click in Tasmota so I couldn’t resist… Once the ADC pin is enabled I got the reading on the main page and Tasmota automatically sends the ADC value through via MQTT so I can then pick it up in Home Assistant as a sensor.
7. Final Words
I really like these, it took me less than two hours to get three of them set up, they have been running stable without issues for two weeks now and very much do what I need. For under £35 per unit I’m very happy with the price and the power supplies I picked easily run several of them with the added benefit of a USB port to power other things.